Data Services Console
This article explains the steps to configure the CDP PvC Data Services environment. This sets the stage for hosting CML, CDE and CDW services which will be explained in the subsequent subtopics.
LDAP User Setting
In CM, navigate to
Data Services. ClickOpen CDP Private Cloud Data Services.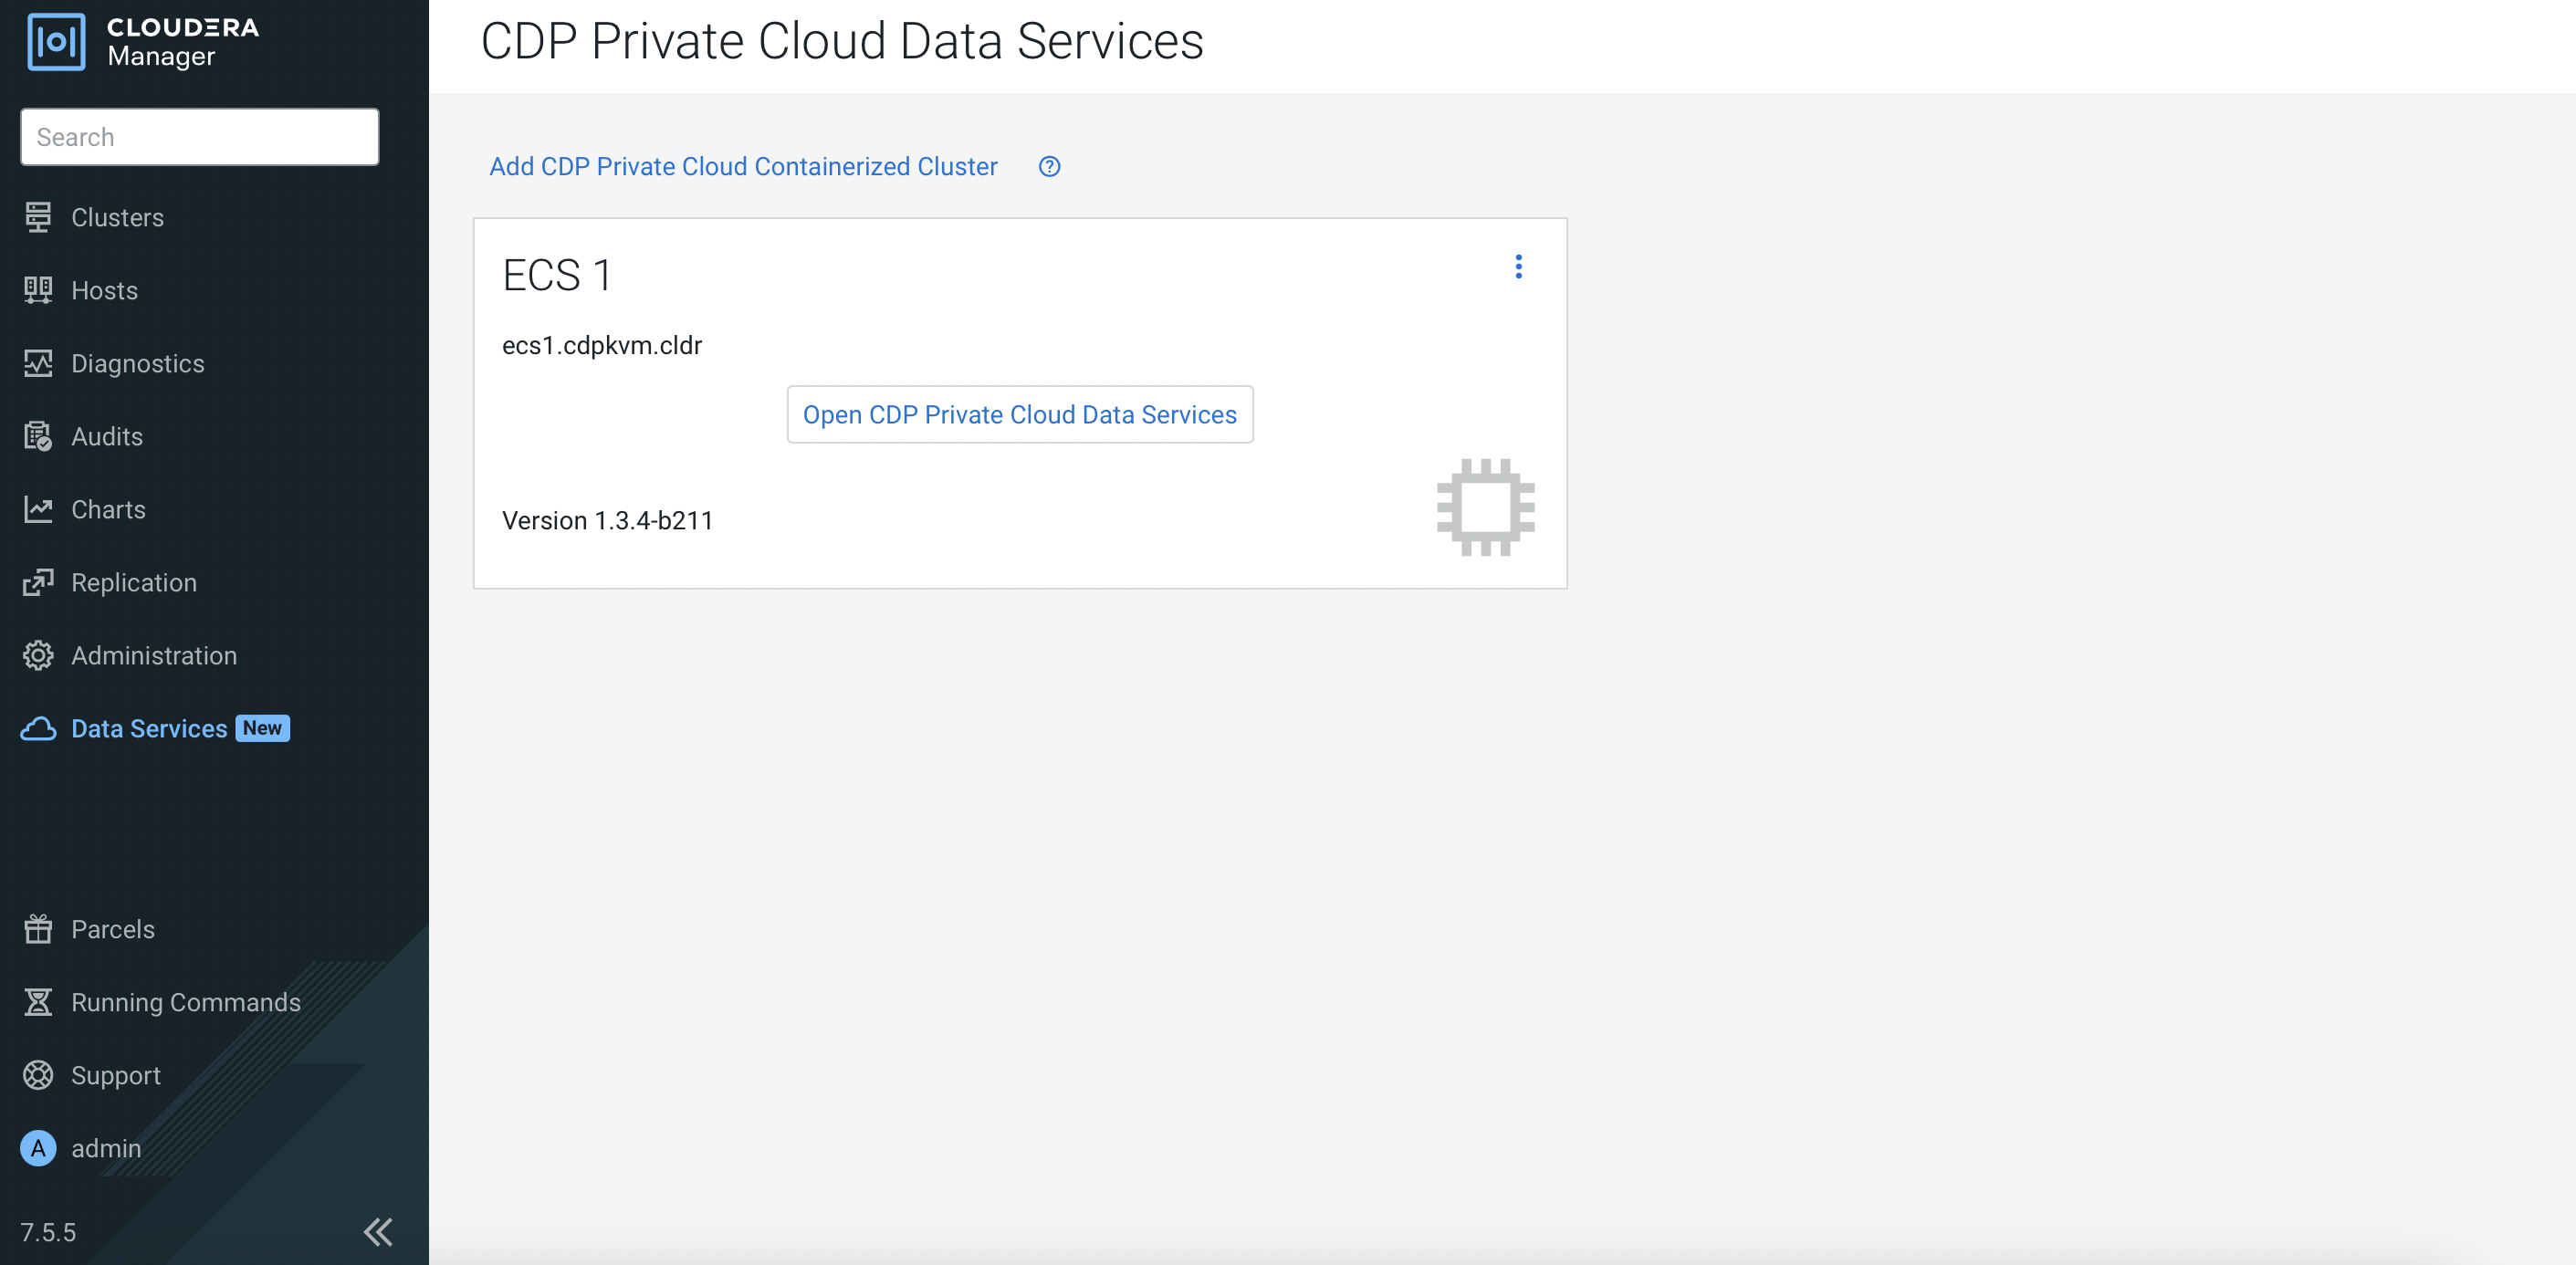
The system will redirect the browser to the
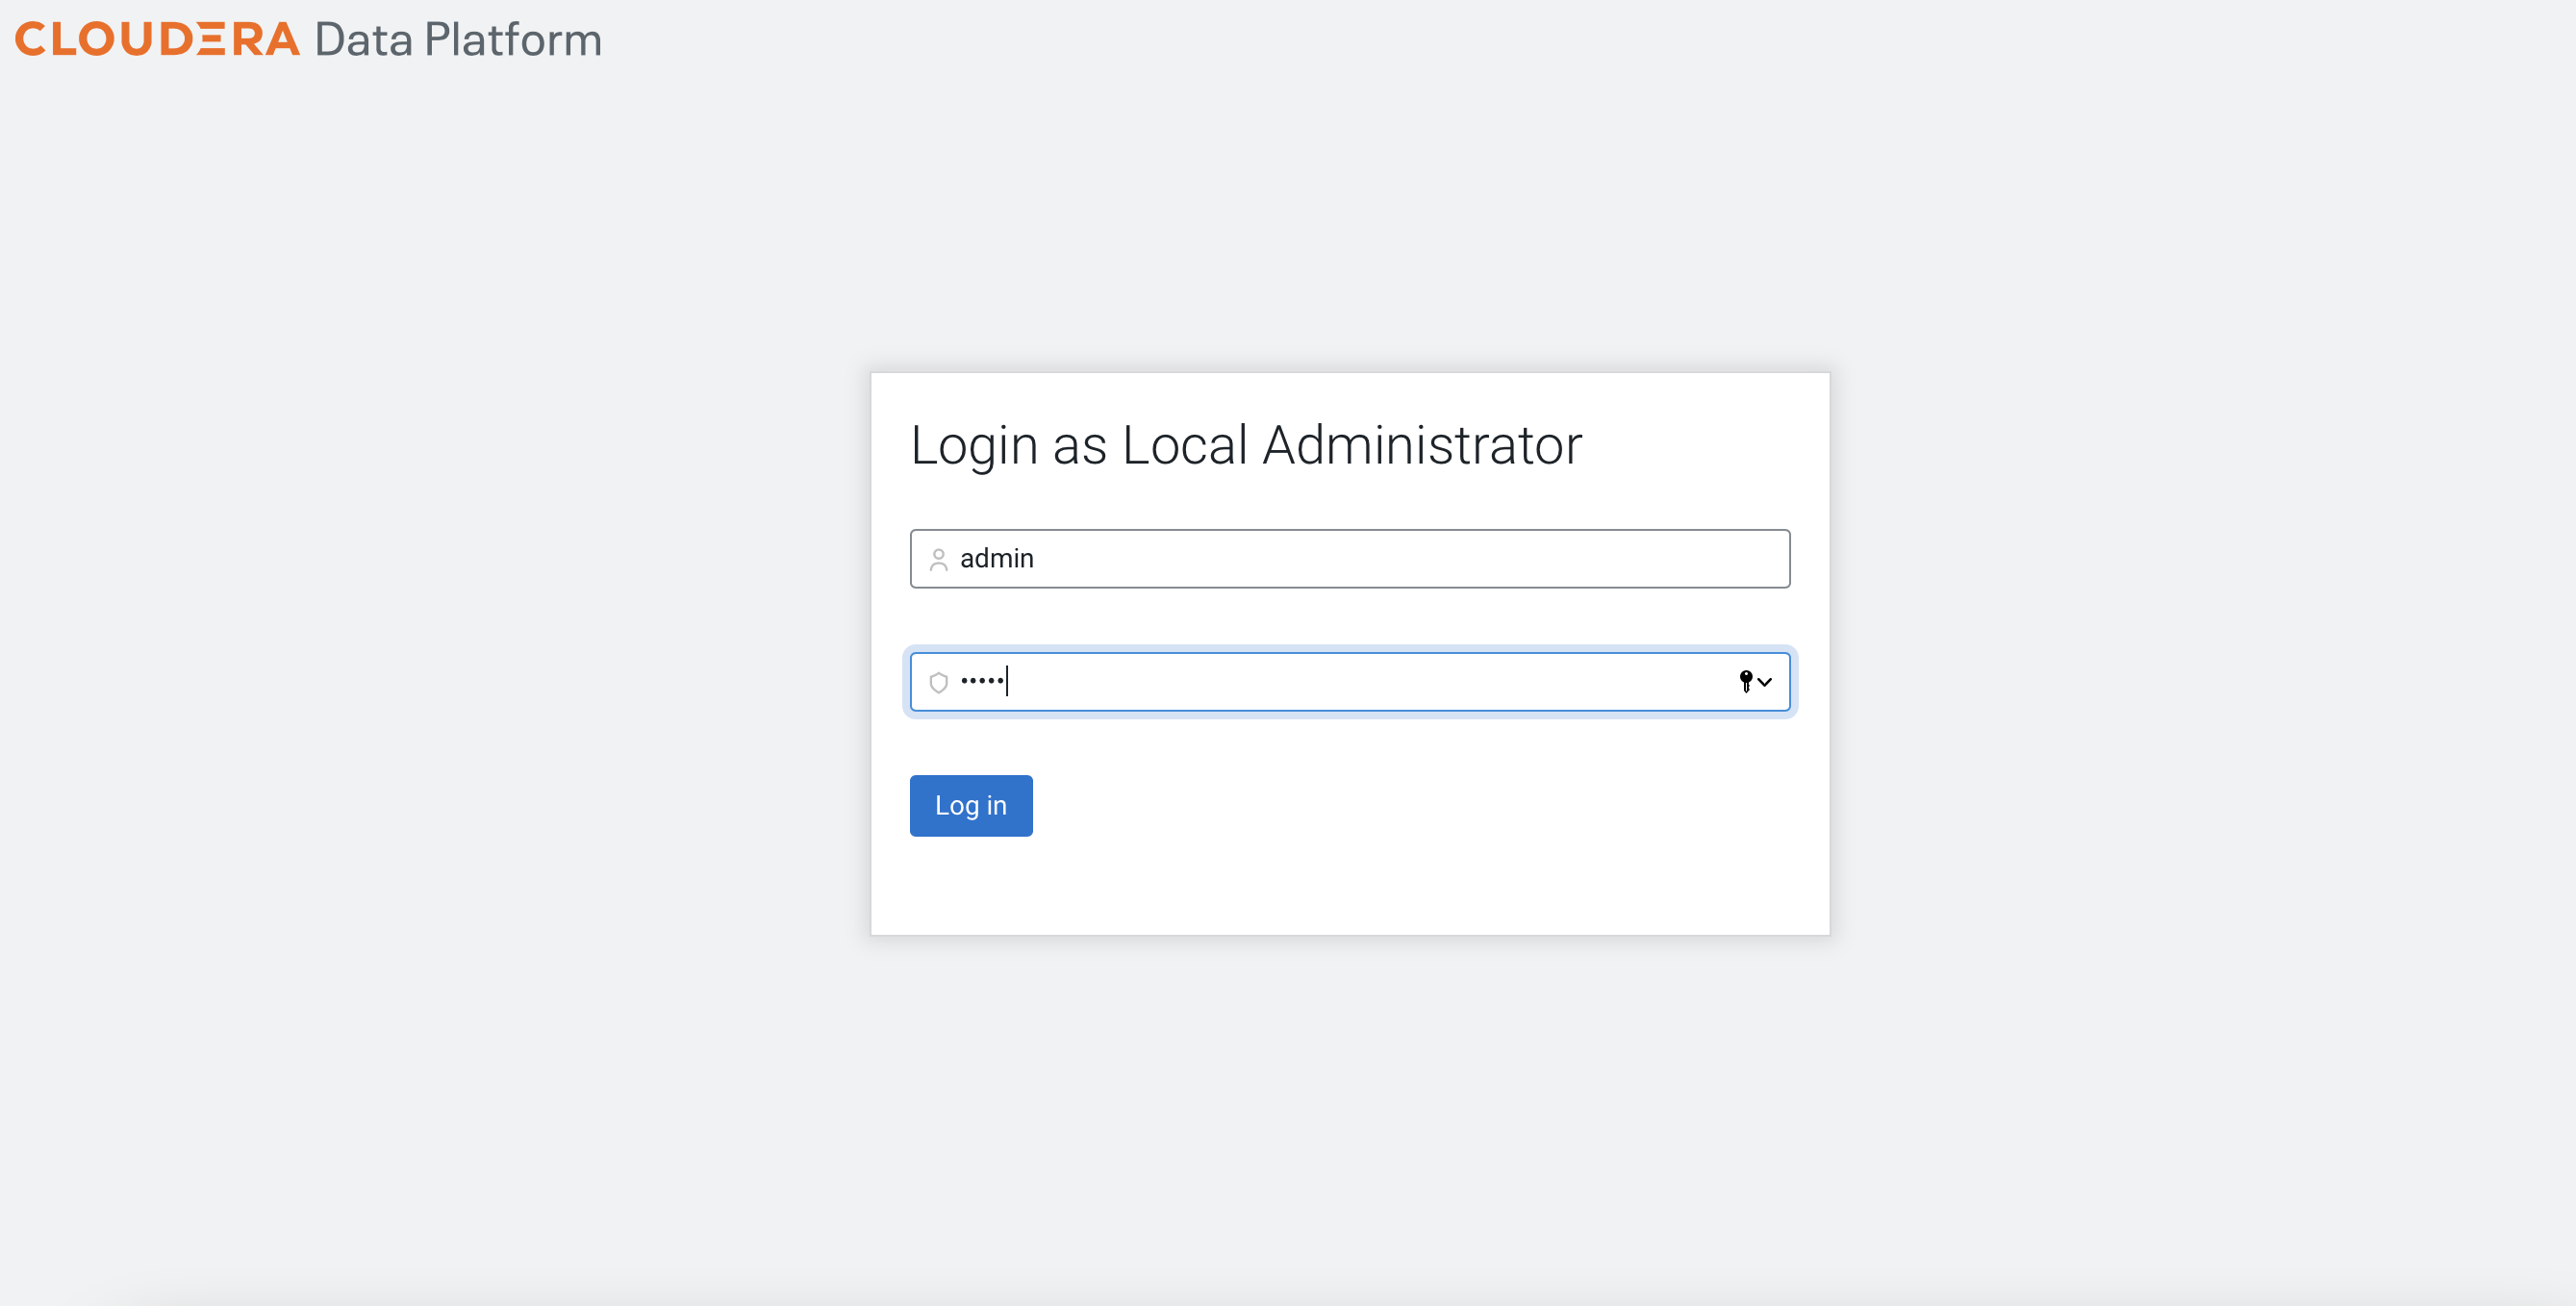
Management Consolelanding page.Log in as the Local Administrator.
Navigate to
Administration>Authentication. The external LDAP server is the centralized user authentication database that stores the user credentials with the associated group. This demo is connected to the Red Hat IPA. Fill in the necessary external LDAP server fields as shown in the following example. ClickTest Connectionand check that the connection is successful. ClickSave.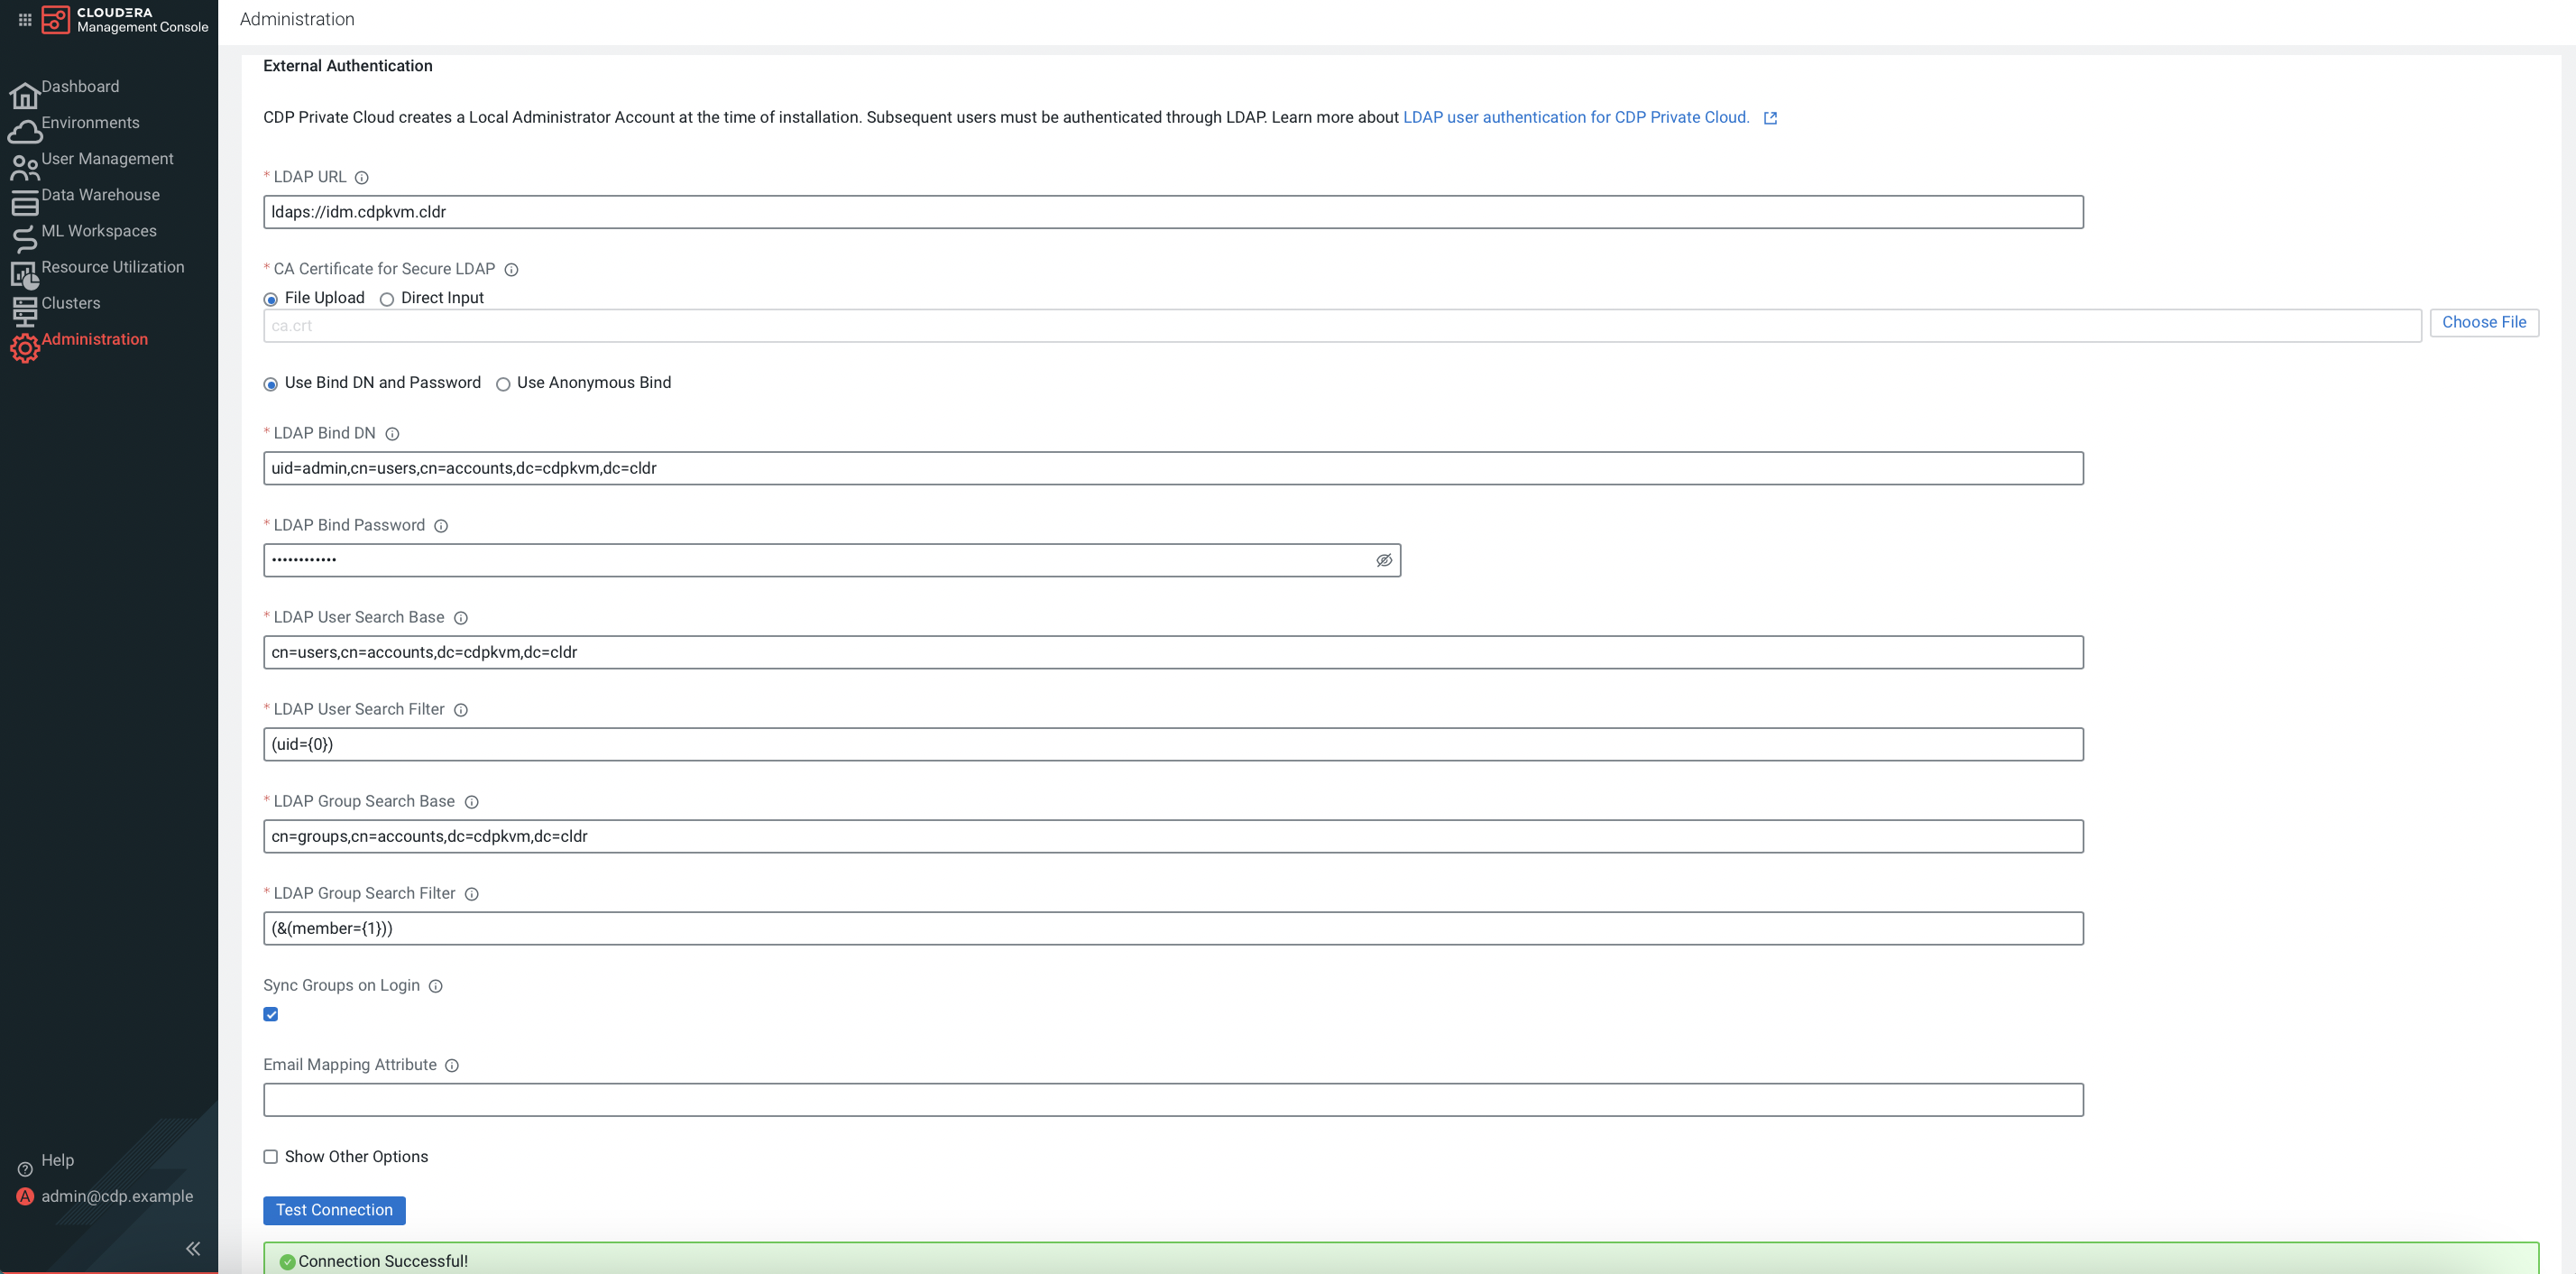
Cross check with the output of the LDAP command as shown in the example below.
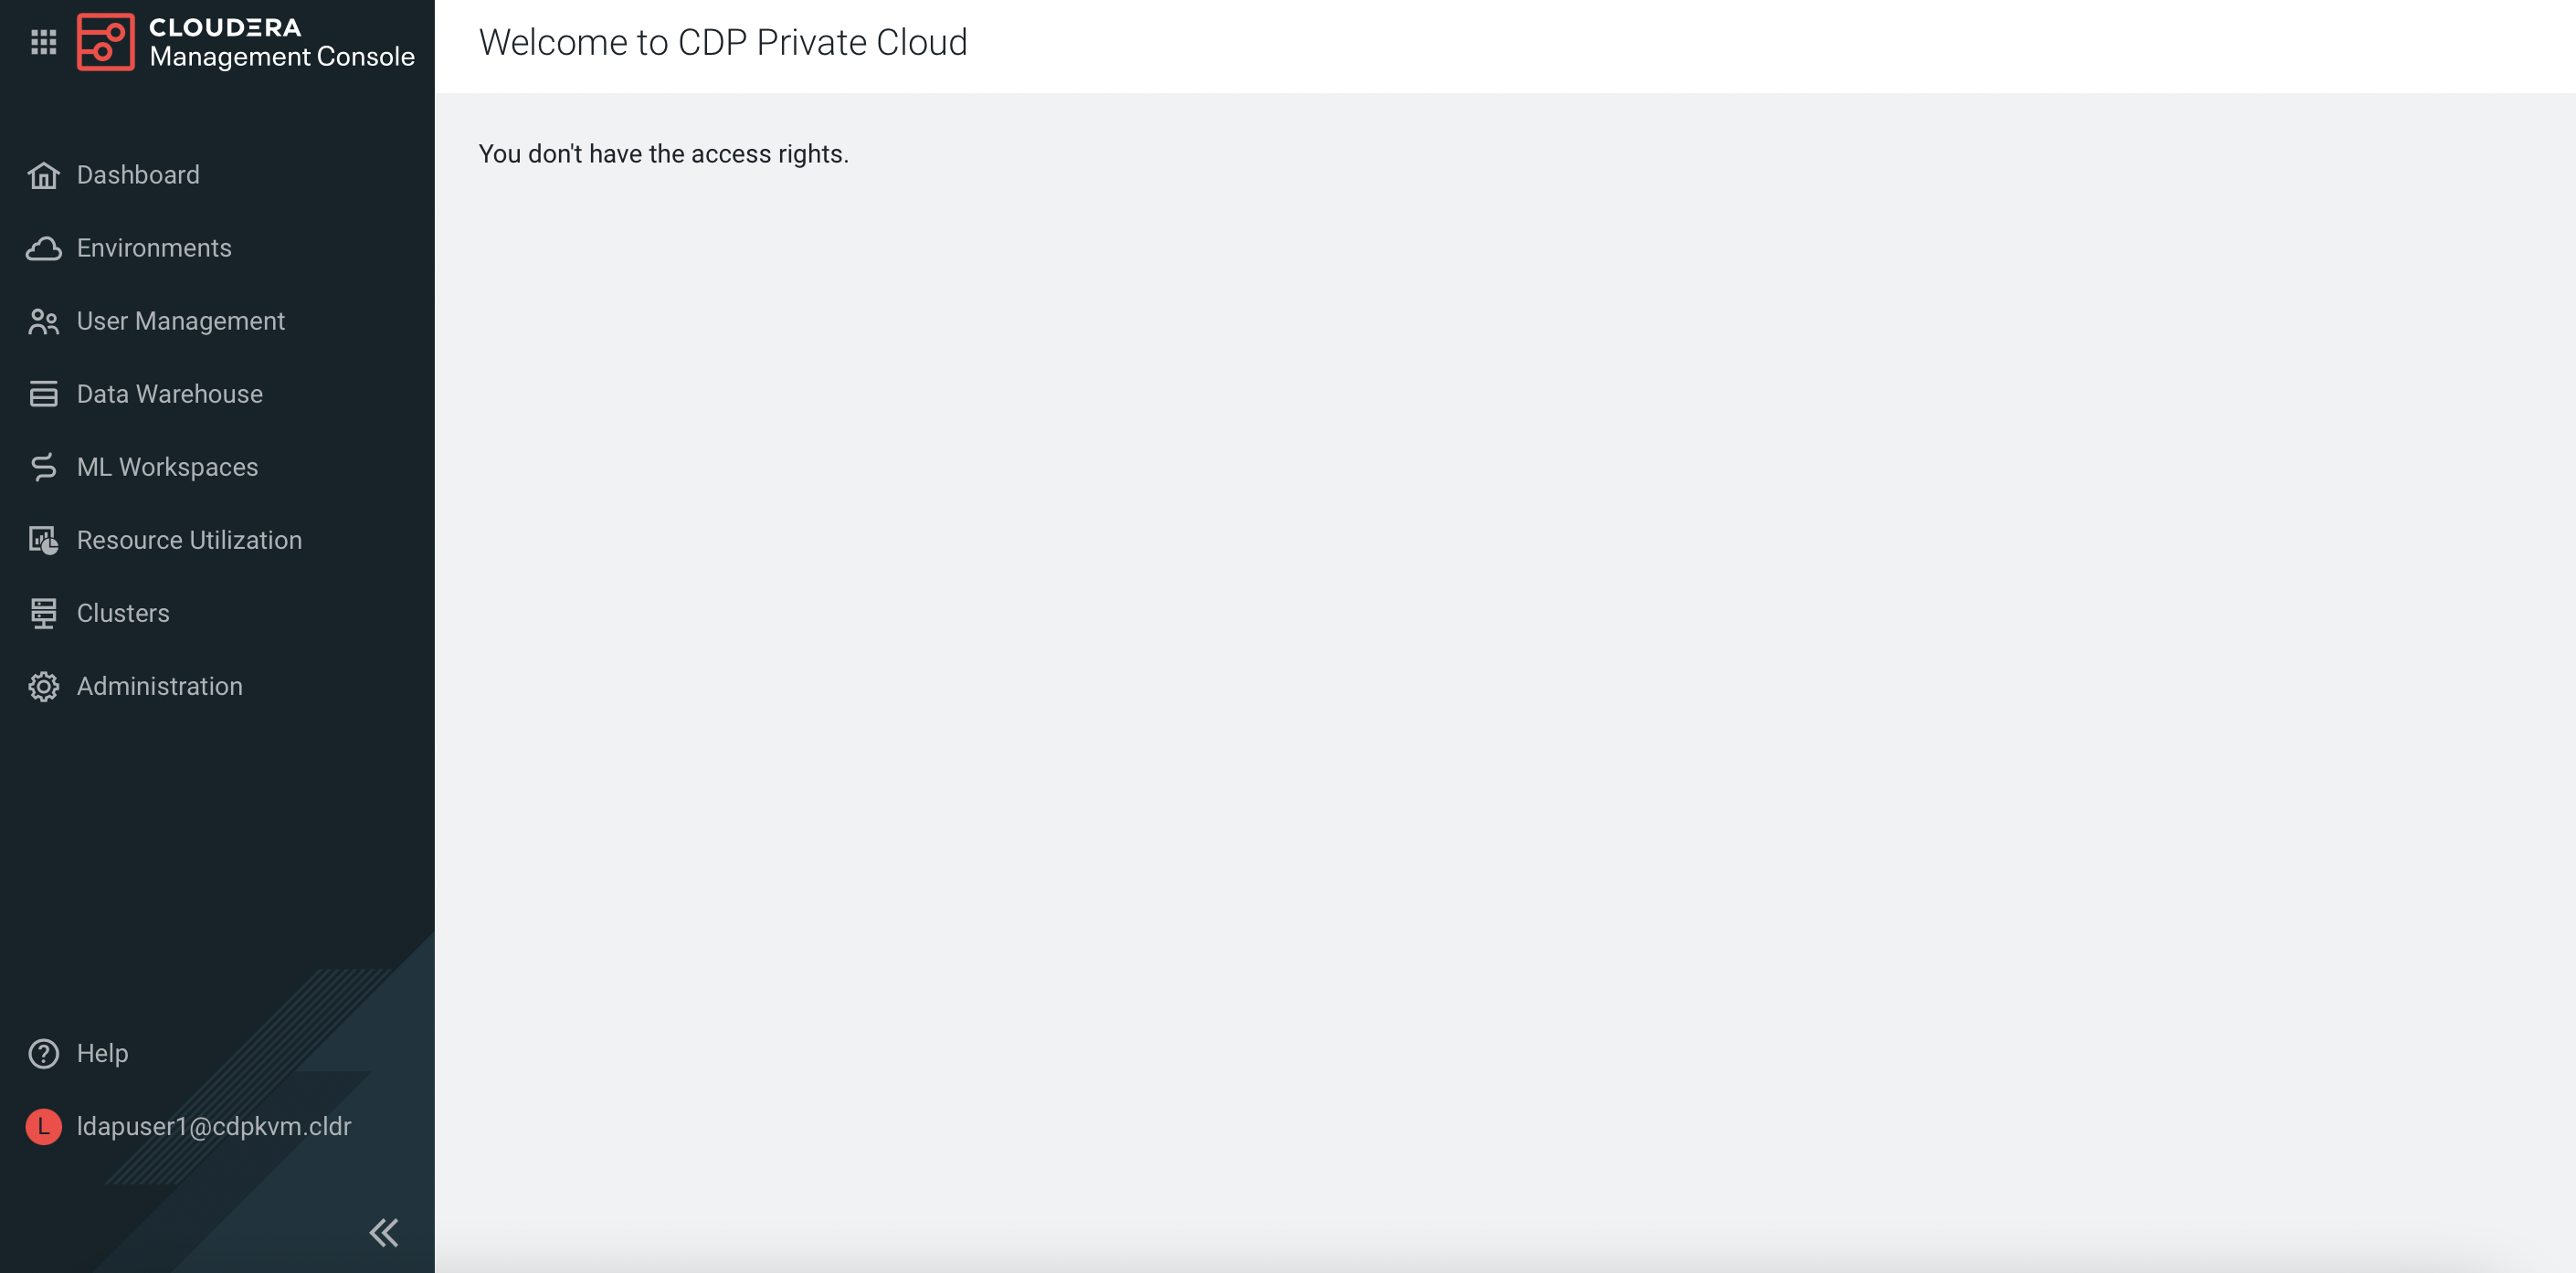
 #  ldapsearch  -H ldap://idm.cdpkvm.cldr:389 -D "uid=admin,cn=users,cn=accounts,dc=cdpkvm,dc=cldr" -w 'rootroot' -b "cn=users,cn=accounts,dc=cdpkvm,dc=cldr" '(&(uid=ldapuser1))' | grep -v "#"

 dn: uid=ldapuser1,cn=users,cn=accounts,dc=cdpkvm,dc=cldr
 displayName: ldapuser1 ldapuser1
 uid: ldapuser1
 krbCanonicalName: ldapuser1@CDPKVM.CLDR
 objectClass: top
 objectClass: person
 objectClass: organizationalperson
 objectClass: inetorgperson
 objectClass: inetuser
 objectClass: posixaccount
 objectClass: krbprincipalaux
 objectClass: krbticketpolicyaux
 objectClass: ipaobject
 objectClass: ipasshuser
 objectClass: ipaSshGroupOfPubKeys
 objectClass: mepOriginEntry
 loginShell: /bin/sh
 initials: ll
 gecos: ldapuser1 ldapuser1
 sn: ldapuser1
 homeDirectory: /home/ldapuser1
 mail: ldapuser1@cdpkvm.cldr
 krbPrincipalName: ldapuser1@CDPKVM.CLDR
 givenName: ldapuser1
 cn: ldapuser1 ldapuser1
 ipaUniqueID: 4a377c9c-d82b-11ec-995e-525400b4be20
 uidNumber: 371000021
 gidNumber: 371000021
 krbLastPwdChange: 20220520105515Z
 krbExtraData:: AAKTc4dia2FkbWluZEBDRFBLVk0uQ0xEUgA=
 mepManagedEntry: cn=ldapuser1,cn=groups,cn=accounts,dc=cdpkvm,dc=cldr
 memberOf: cn=ipausers,cn=groups,cn=accounts,dc=cdpkvm,dc=cldr
 krbTicketFlags: 128
 krbLoginFailedCount: 0
 krbPasswordExpiration: 20220818105515Z
# ldapsearch -H ldap://idm.cdpkvm.cldr:389 -D "uid=admin,cn=users,cn=accounts,dc=cdpkvm,dc=cldr" -w 'rootroot' -b "cn=groups,cn=accounts,dc=cdpkvm,dc=cldr" '(&(member=uid=ldapuser1,cn=users,cn=accounts,dc=cdpkvm,dc=cldr))' | grep -v "#" dn: cn=ipausers,cn=groups,cn=accounts,dc=cdpkvm,dc=cldr objectClass: top objectClass: groupofnames objectClass: nestedgroup objectClass: ipausergroup objectClass: ipaobject description: Default group for all users cn: ipausers ipaUniqueID: 894cae12-bcd2-11ec-9ceb-525400b4be20 member: uid=cmadmin-97fd6767,cn=users,cn=accounts,dc=cdpkvm,dc=cldr member: uid=ldapuser1,cn=users,cn=accounts,dc=cdpkvm,dc=cldr member: uid=test,cn=users,cn=accounts,dc=cdpkvm,dc=cldrLog out and log in using the LDAP user credential.

The system is expected to prompt “You don’t have the access rights”.
Log out and log in as the Local Administrator. Navigate to
User Management. ClickUpdate Rolesnext to the LDAP user.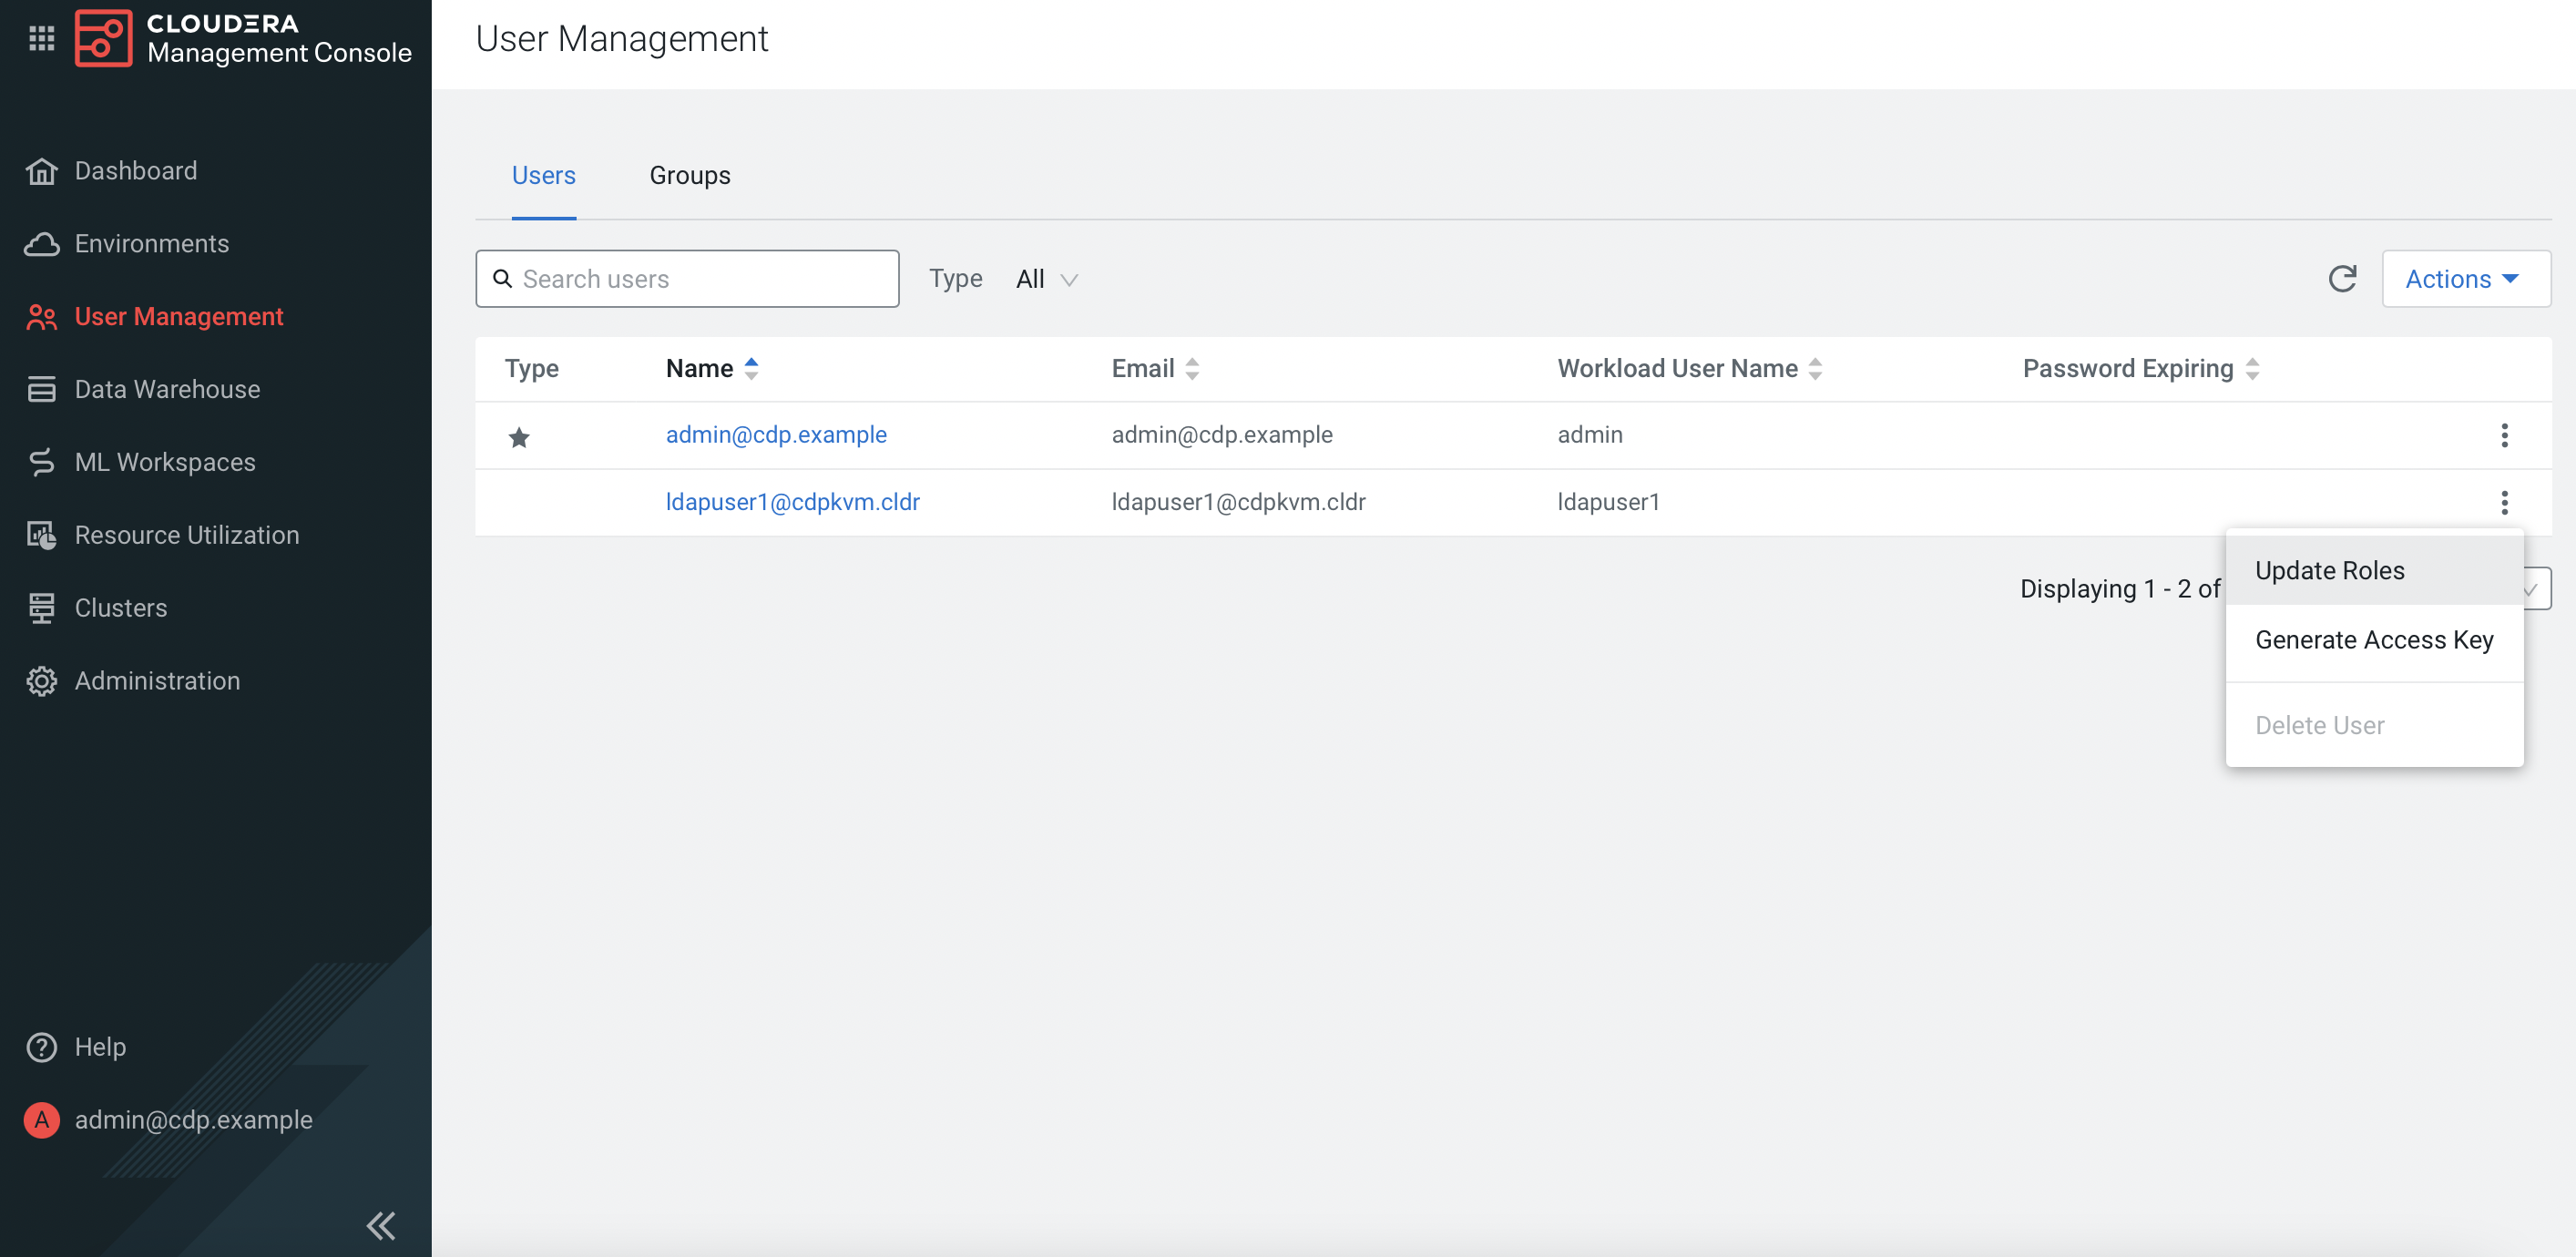
Select the roles for this LDAP user accordingly. Click
Update Roles.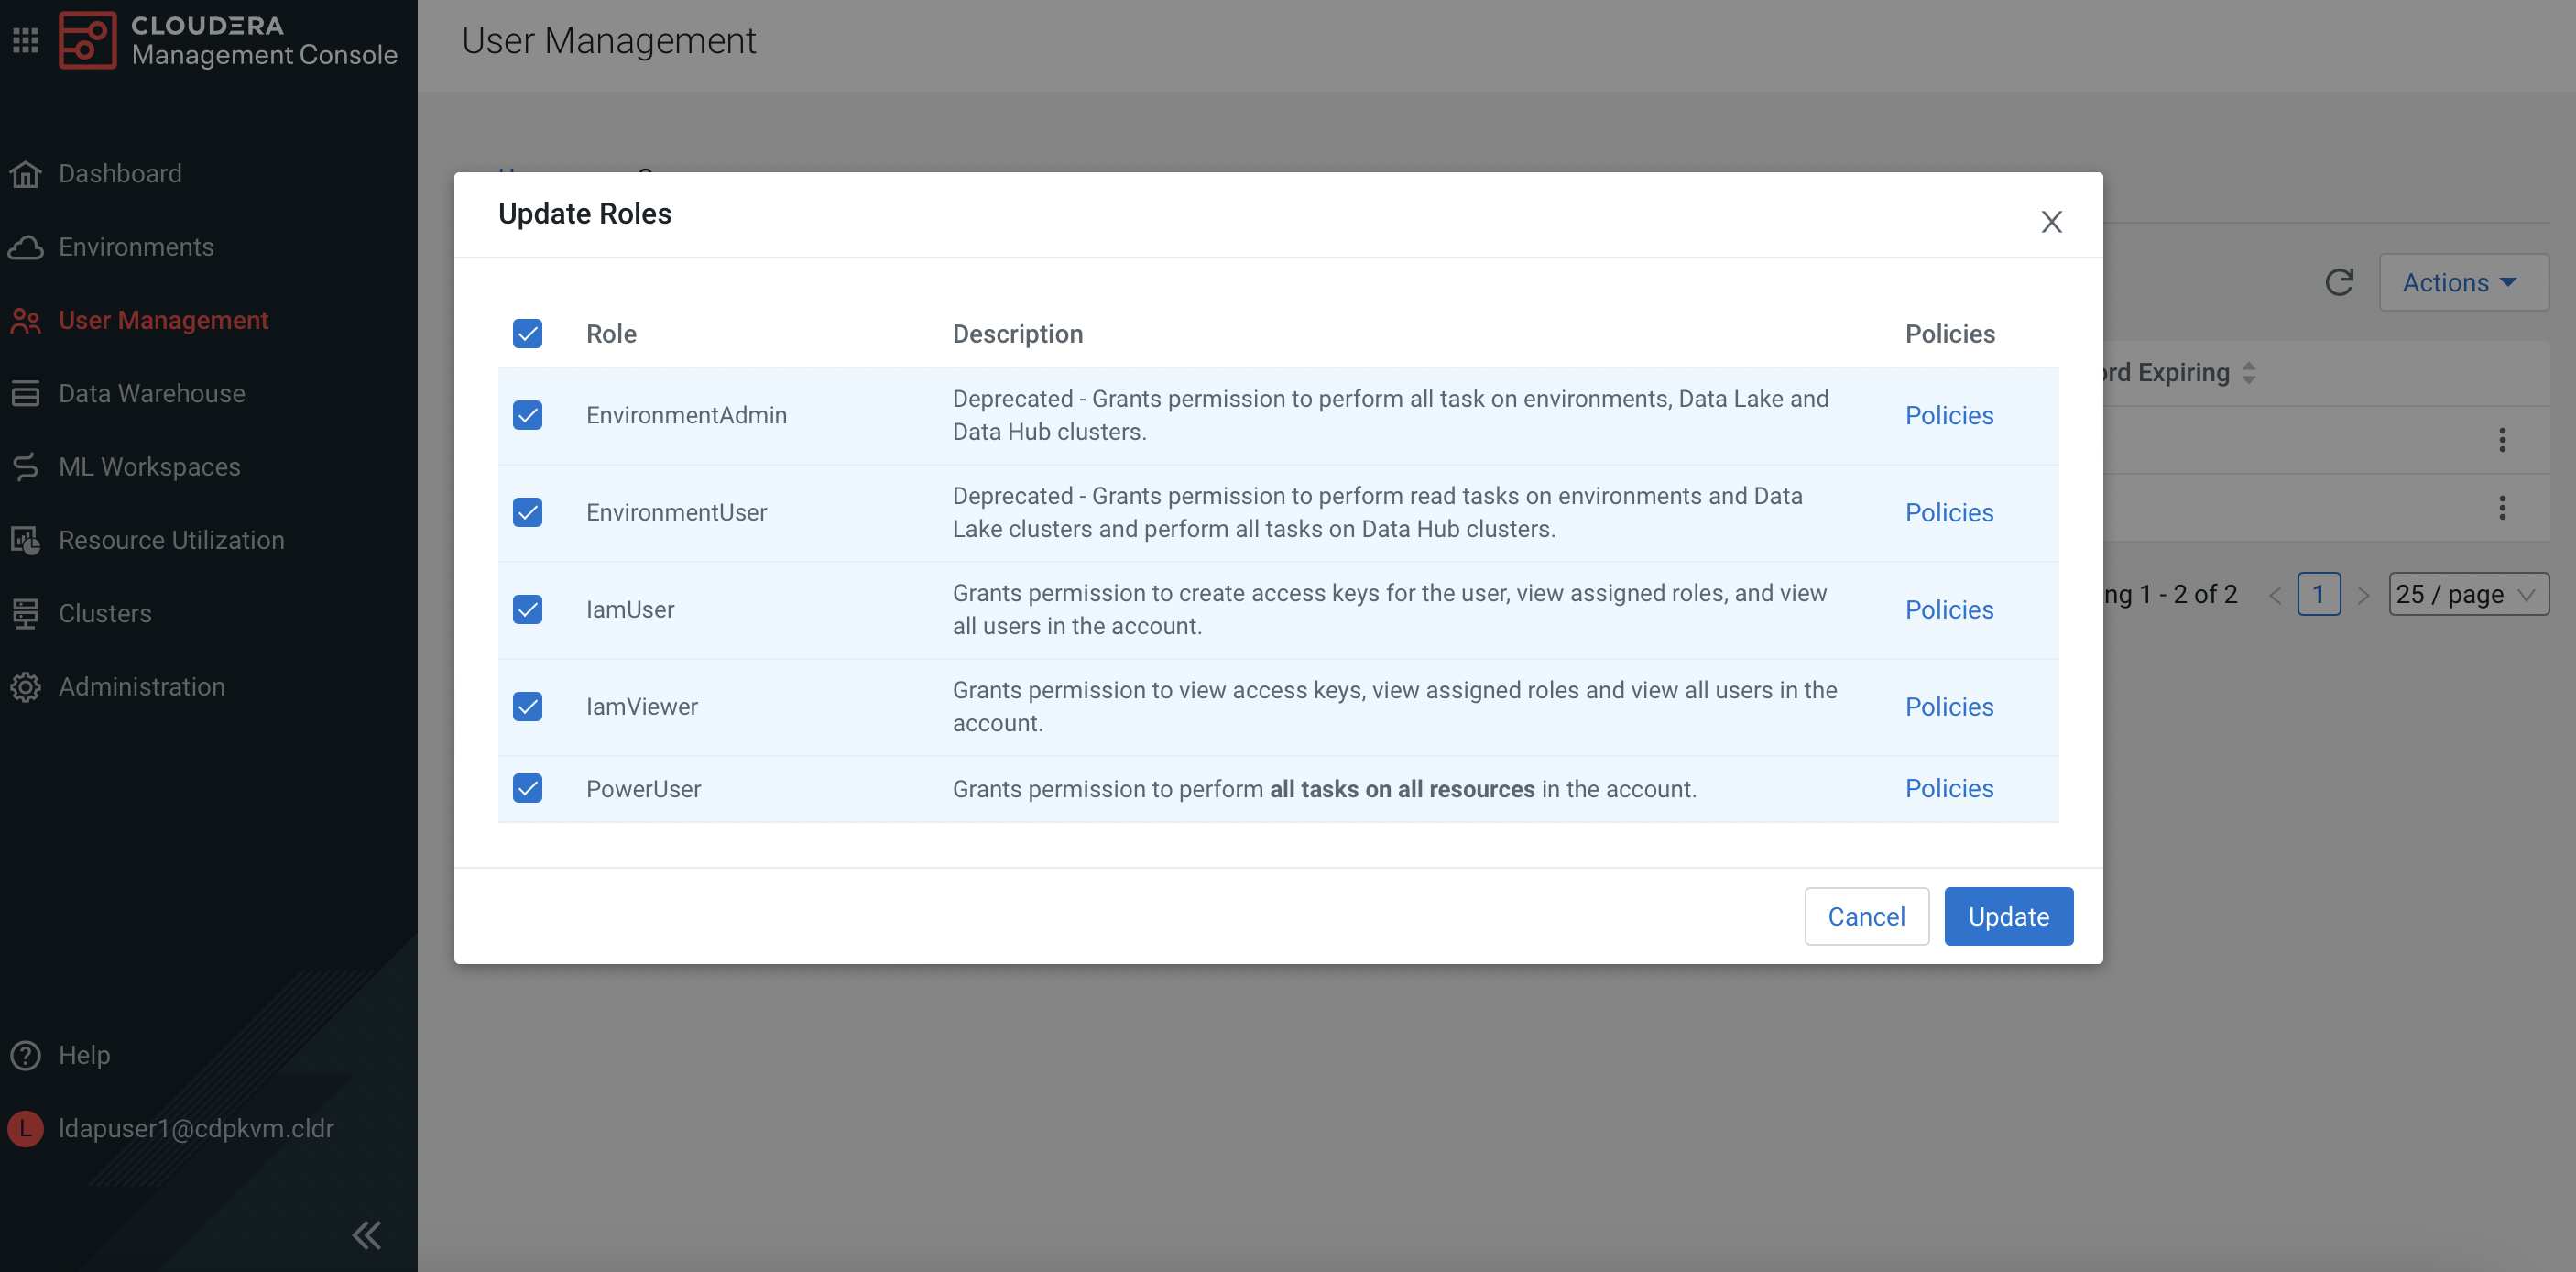
Log out and log in as the LDAP user. This time, the LDAP user will get full access rights.
CDP Data Lake Environment
Log in as the LDAP user. Navigate to
Environments. There is only one environment which is the default environment created by the system upon successful installation of the ECS platform. ClickRegister Environment. Fill in the fields to create a data lake environment for the CDP Data Services to use.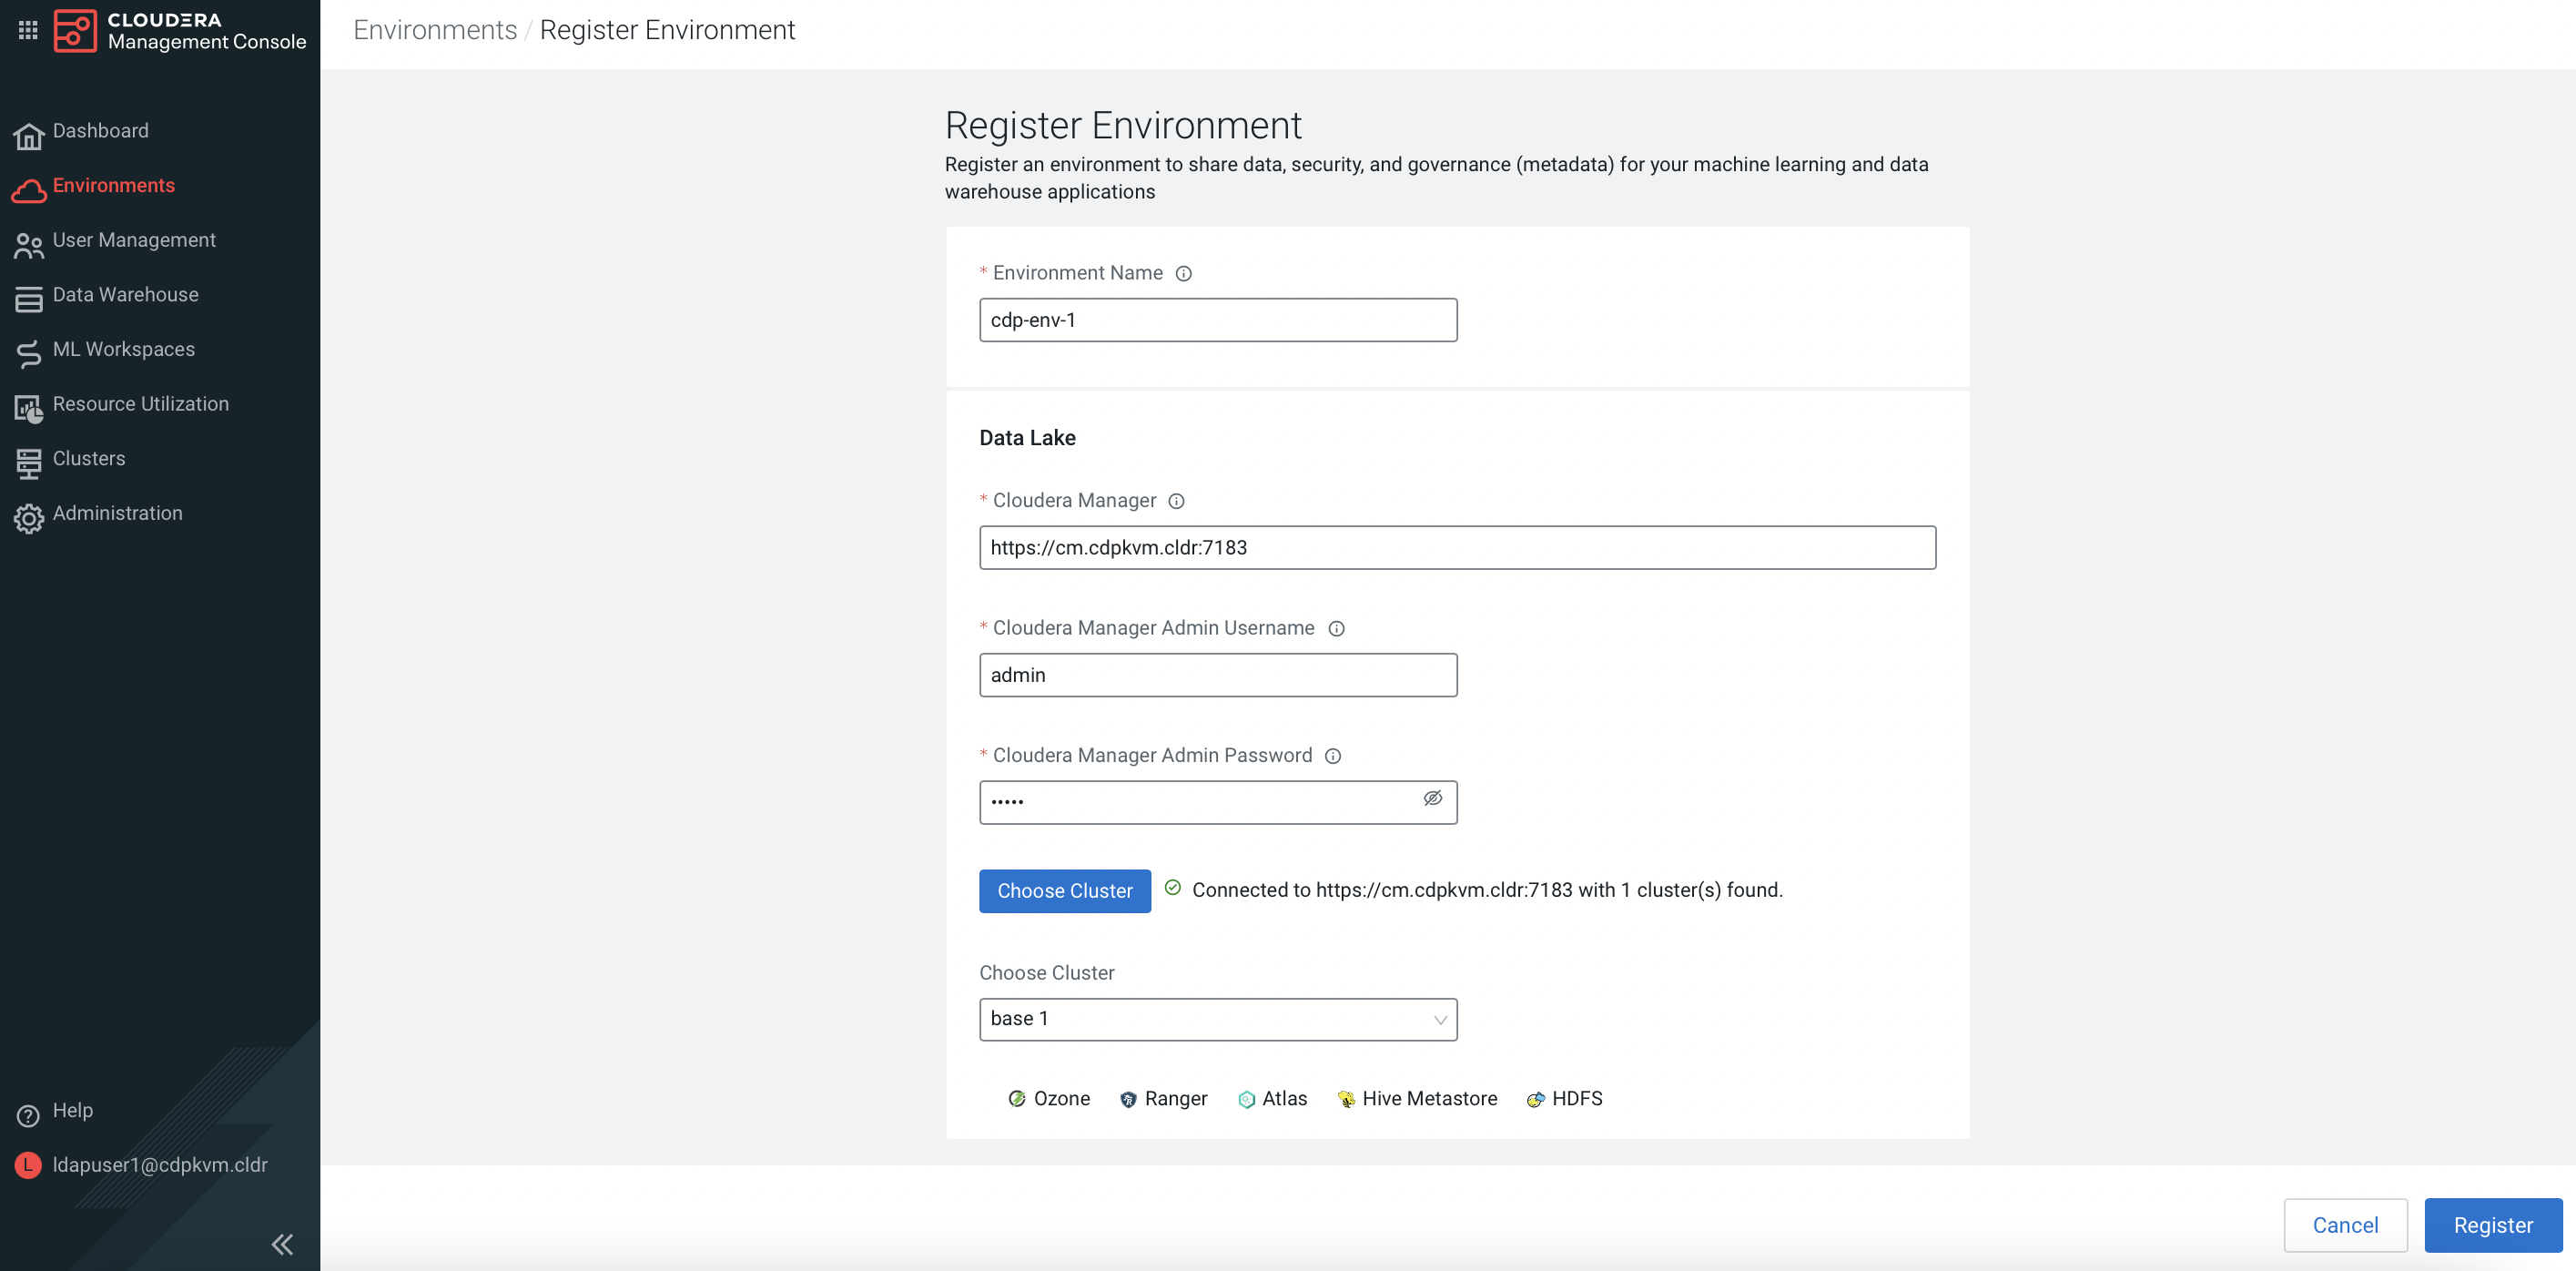
Click
Manage Accessof this newly created environment.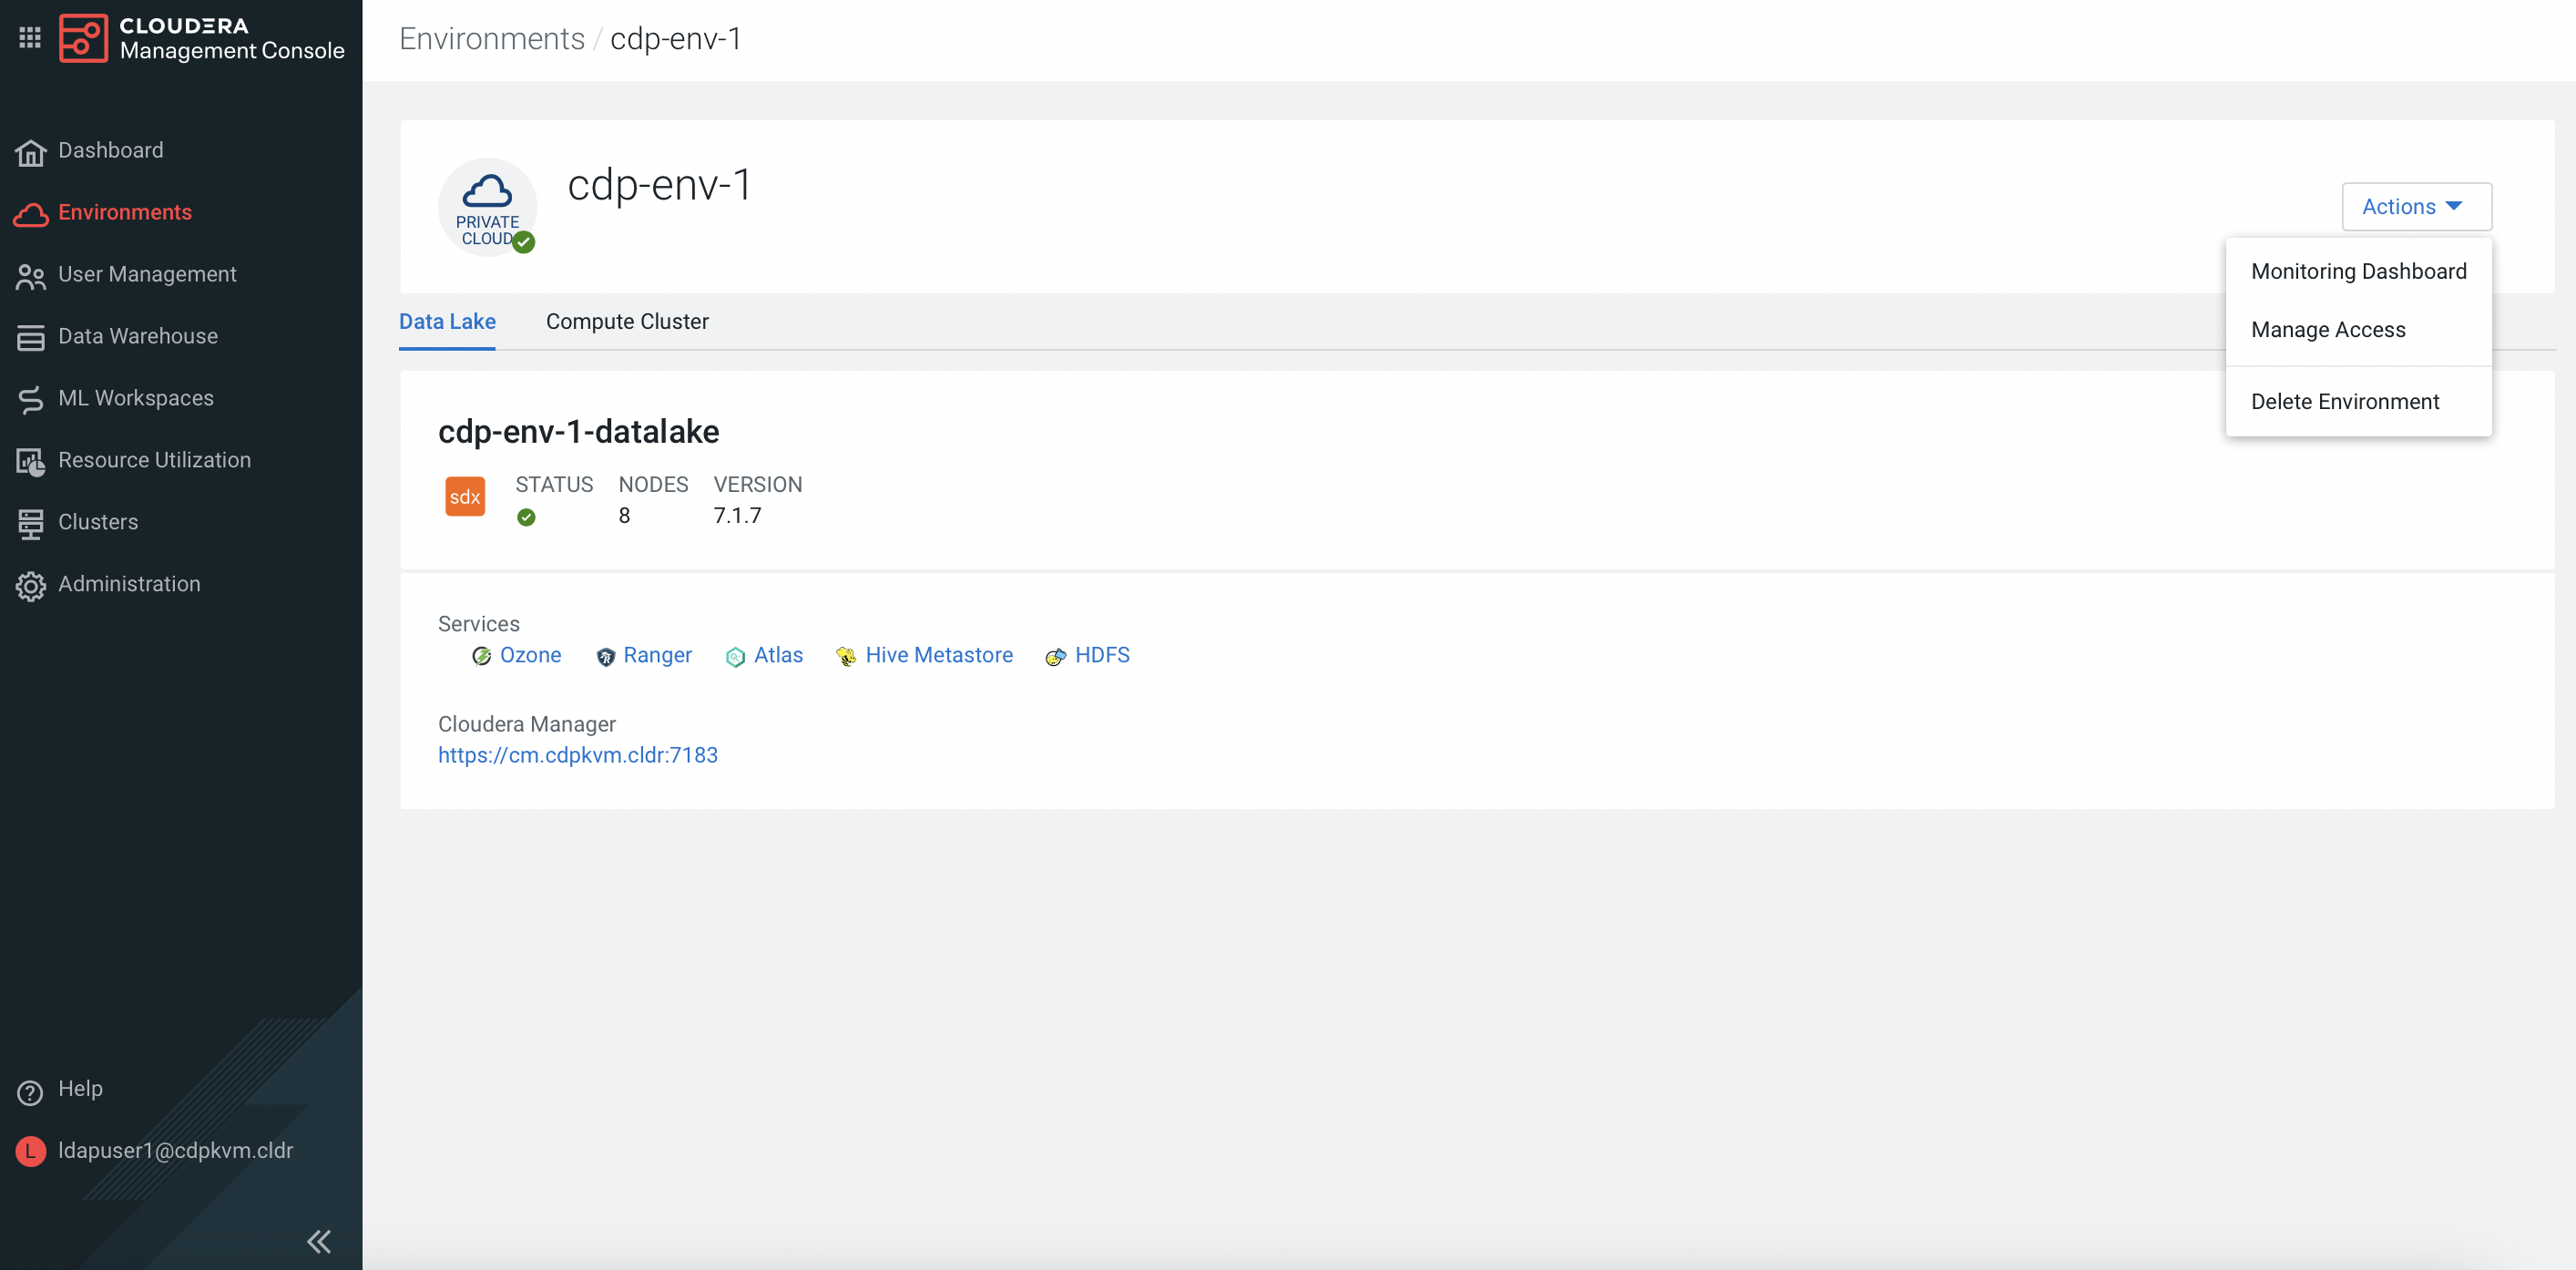
Select the
DL*,DE*andML*roles for this LDAP user in this newly created environment accordingly. ClickUpdate Roles.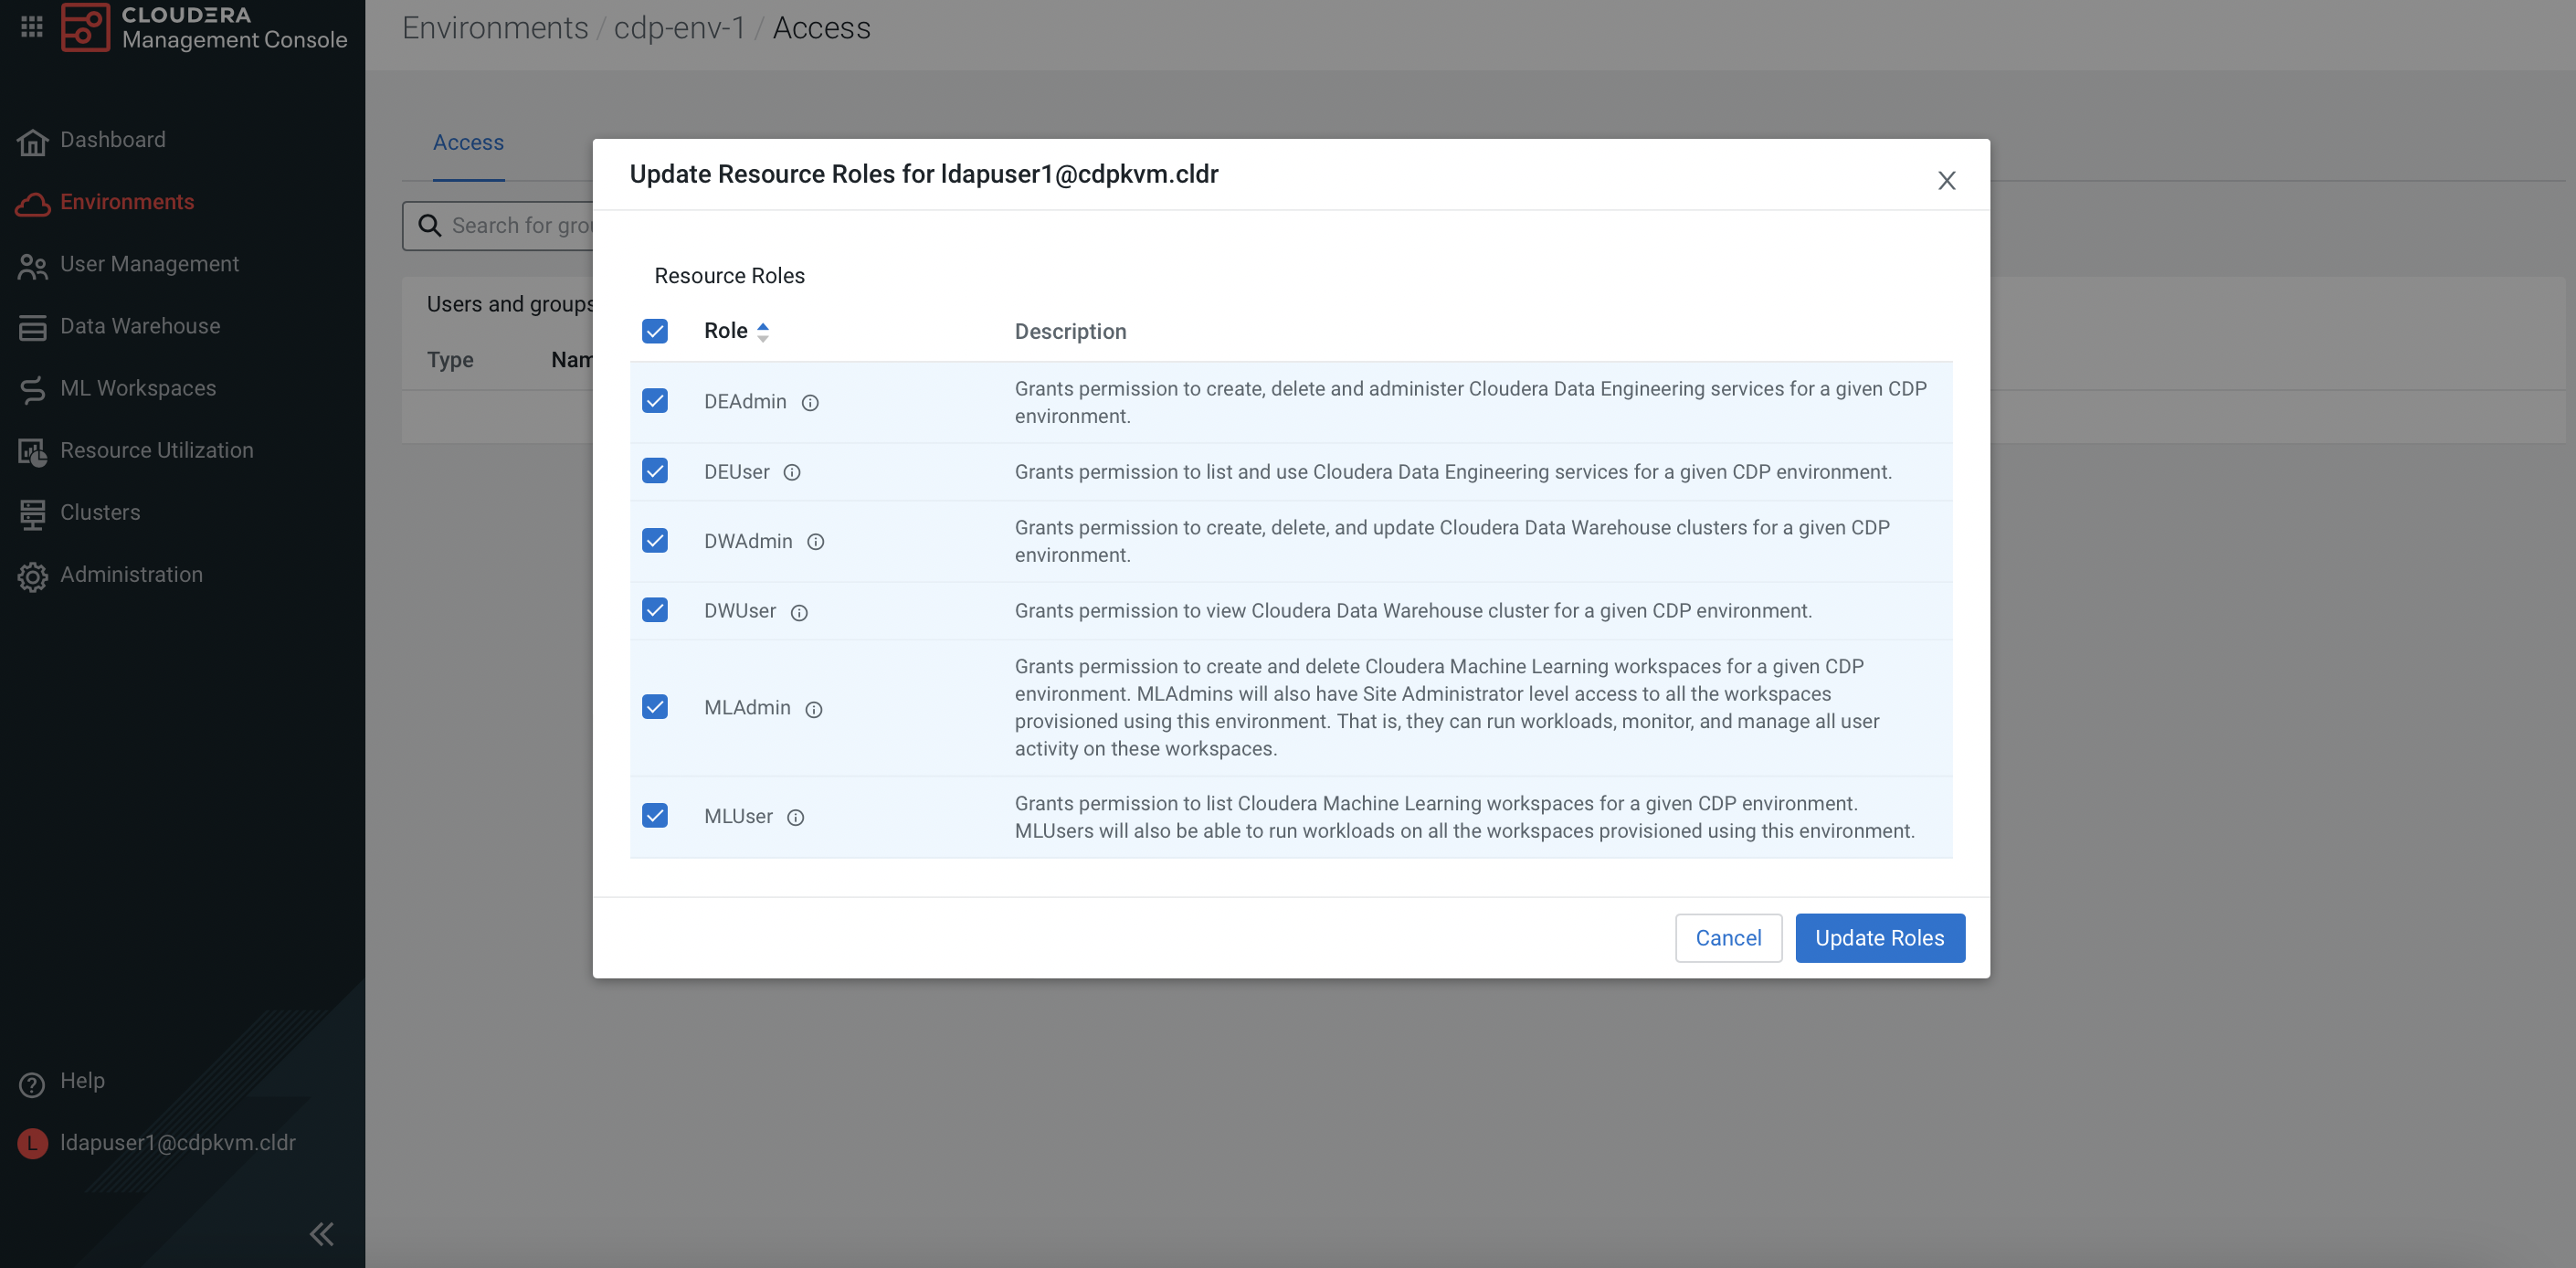
Next Step
- Create the CML service in this subtopic.
- Create the CDW service (ECS) in this subtopic.
- Create the CDW service (Openshift) in this subtopic.
- Create the CDE service (ECS) in this subtopic.
- Create the CDE service (Openshift) in this subtopic.